Templates are great for word processors and spreadsheets; they save time and enforce consistency. Of course, templates are great for Power BI, too, but Power BI templates must solve a minor complication not faced by its sister Office applications.
The measures, columns, and visualizations that collectively constitute a Power BI report are based on a specific data model. Therefore, to develop a template for a Power BI report, we must define the data model but provide parameters to let the user specify the data to be imported into the data model when they open the template. These parameters might be as simple as the start date and end date of a monthly report.
Creating Parameters
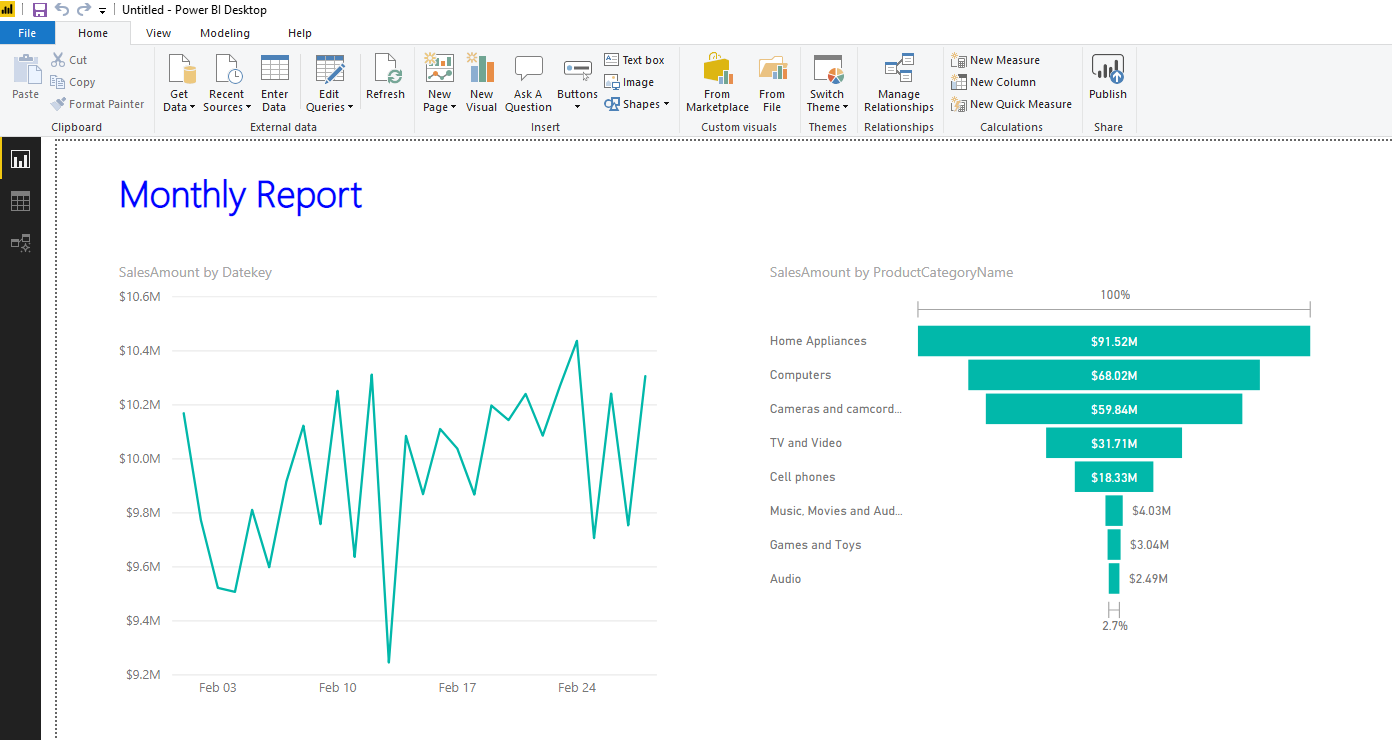
We'll start with a simple Power BI sales report for the Contoso group. After that, a line and funnel chart showing sales by date and product category will suffice for our demonstration.
You can create named parameters in a Power BI report for slicers and DAX expressions. However, these are not the parameters we need for a Power BI template. The parameters we want are defined not in Power BI but in Power Query and will be applied when a user first opens a Power BI template. We click on Edit Queries to open the Power Query Editor.
There we will find a Manage Parameters button. "Manage Parameters" and "New Parameter" will both take us to the same dialog box, but "New Parameter" will open the dialog with the first new parameter already entered.
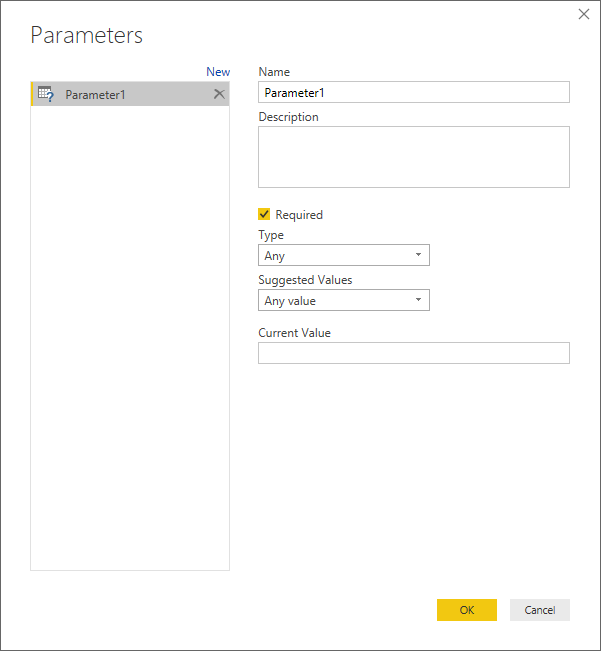
We will use the simple example of the Start Date and End Date parameters in this example. However, anything is fair game for parameterization, including database and server names.
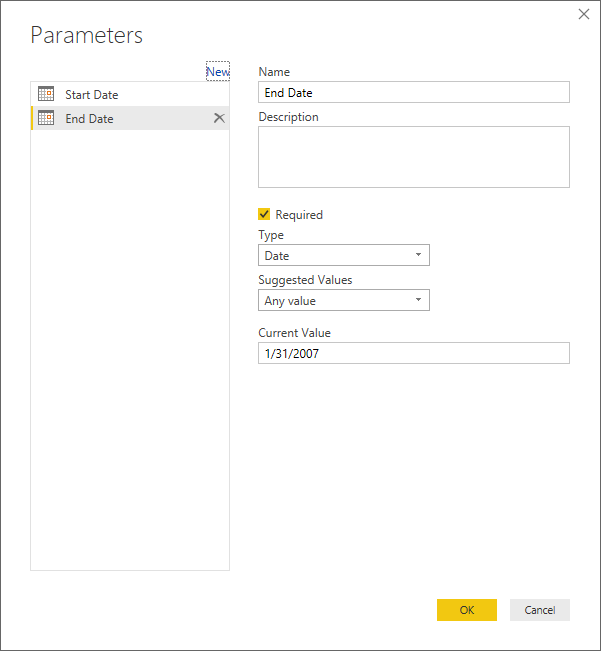
When we create parameters, we should choose unambiguous names. It is also essential to pay attention to the datatype, as we shall see shortly. In this example, we will select the Date datatype.
Filtering on Parameters in Power Query
Once we define our parameters, we can use them to apply a filter to whatever appropriate column, in this case, the FactSales DateKey column.
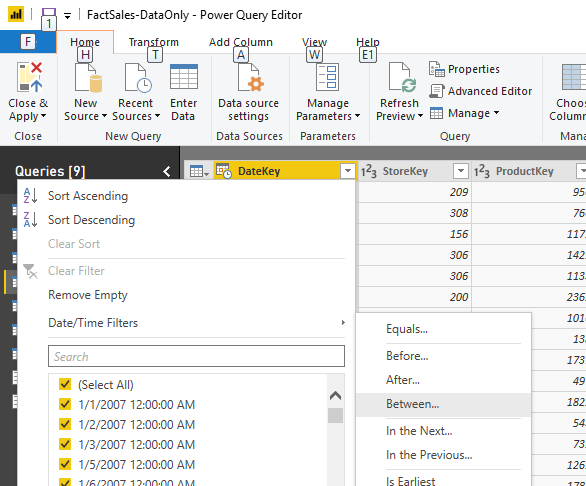
If we apply a filter to the DateKey column, we find no option to use our new parameters in the dialog box.
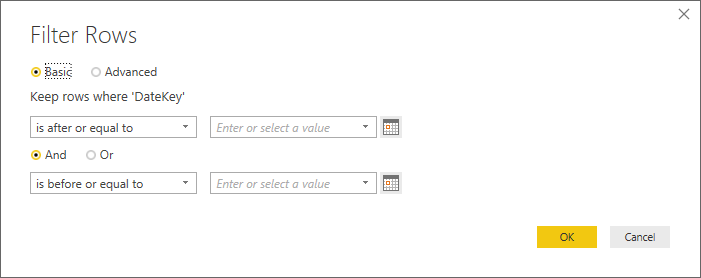
This is due to a mismatch between the parameter and column datatypes. I foolishly chose "Date" for the parameter type while the column is "Date/Time." In this dataset, we can save some space by converting the column type to "Date" to match the parameters. It doesn't matter which types you change; it only matters that they match. Once the datatypes are correctly matched, we see the option we need.

We're now essentially done.
Creating the Template
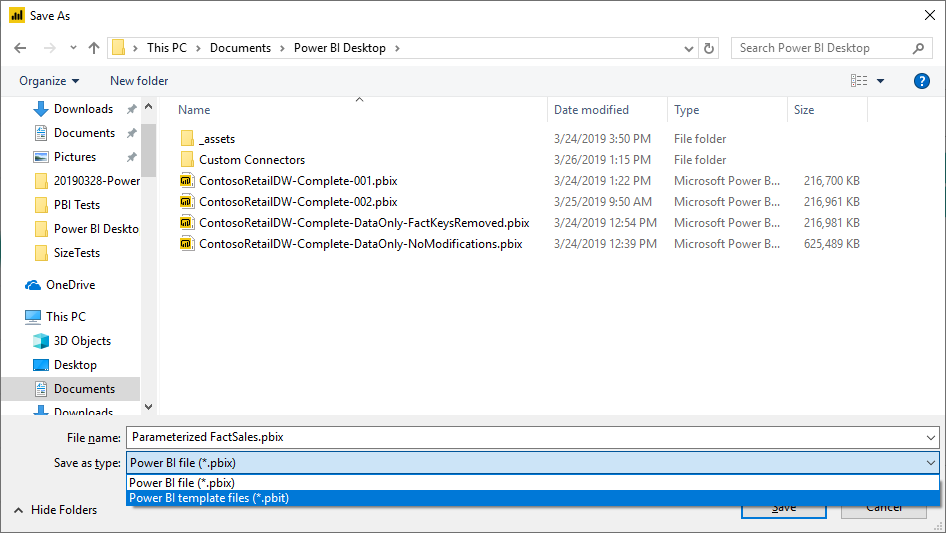
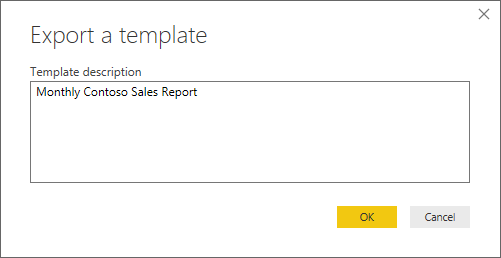
Once the necessary parameters are defined, creating the template is trivial. First, select File | Save As... and choose template files (.pbit) from the dropdown type list in the Save As... dialog. Next, you will be asked to provide a template description.
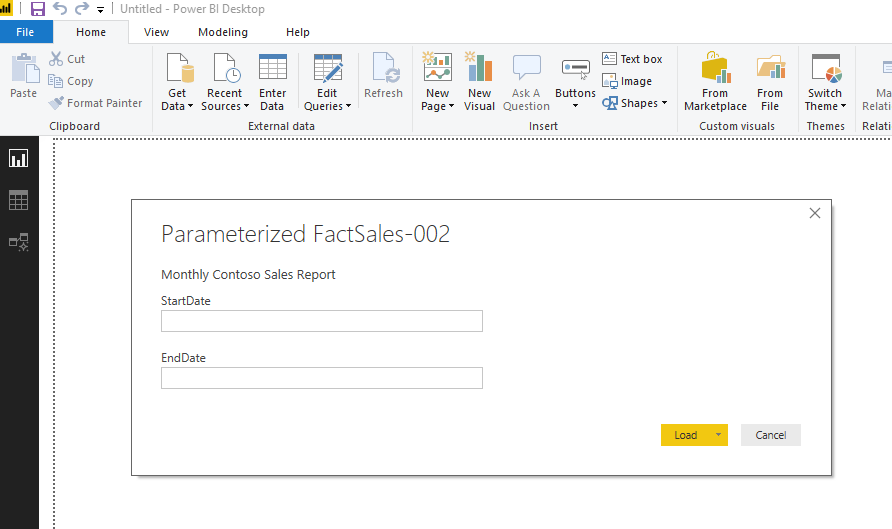
When a user opens a Power BI template, they will be presented with a dialog box providing the opportunity to enter values for the parameters. The description you provided when you created the template will be shown to the user, so it would be a great idea to explain exactly what values are being requested and how to enter them.
Conclusion
Power BI desktop templates are easy to create. The selection of appropriate Power Query parameters can take any Power BI report and turn it into a reusable resource.
Get essential data management, analysis, and visualization skills with Power BI Training Courses.
This piece was originally posted on July 16, 2019, and has been refreshed with updated styling.